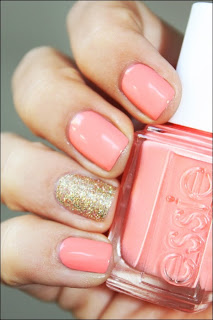
I taught myself to do this, because I've been buying those cheap fake nails at Target & Claire's ever since I was 11. You know when you see those gorgeous nails on Pinterest? You say "I just wish I was talented enough to do that." or "My nails are not long enough to do this."


I know right?! AMAZING! I'm going to show you how to make your not-so-great nails, into beautiful nails!
I found these about a year ago [at Target]. I wondered, what on earth would you do with these. So I bought them and brainstormed. My "nail-world" has been changed ever since! :)
STEP 1:
Find everything you need, and then take any excess or old nail polish off of your finger nails.
STEP 2:
Second, use a file and go over the top coat of your nails. They will feel rough, and have white sandy flakes. Don't rub them off once you're done, just leave them. Also push your cuticles down so the glue doesn't stick to them.STEP 3:
Next, find all of the right size nails. Make sure each one fits just right! You don't want it over lapping skin or being too small. Apply the glue just to the bottom of the nail, and press down. The glue should spread across your whole nail. (Be careful, this glue is very strong. I would know from experience... :) too many fingers stuck together)
STEP 4:
Once you have all of your fake nails glued securely on, you can move onto the next part. I would wait and let your nails sit for just a couple minutes.
Use a small/thin scissors and cut the rounded tip of the nails. You don't want to use big scissors or school scissors because those could pop the nail right off.
STEP 5:
Lastly, use the file again and shape all of the nails to your liking. After your nails are shaped, go ahead and pick your fave color of nail polish. It's your choice if you want to add a clear top coat or not.
FINAL!
Hope it helped! Have a nail-tastic day!
~Michlyn


10 comments:
best post....EVER!!
an in It helped me SO much!! :D
sorry for all the comments..one more! What type/ brand of nails do you buy?? :)
Hey Emily!
No problem, glad you liked it! The big pack of clearish/white ones are the ones unusually buy. They are called KISS and they come with glue included for around $5.97
Stop by again soon!
~Michlyn
Ooo... thanks for the tutorial. My nails are a bit like yours too... though it's because I play the piano and my teacher likes my nails to be short :)
These look so good! Mine are always different lengths and everything so this is very helpful. Thank you! :)
Your welcome! I totally know what you mean... I played piano (I still do but don't take lessons) and my teacher also preferred my nails to be short.
~Michlyn
Wow! Thanks for this, girl! Very helpful=) My nails always seem a bit wacky, too...so this'll be great!
Thanks so much!! :) And where do you get them?
I get them at Target :) near the make up and other beauty products. Good luck!
~Michlyn
P.S. let me know if they turn out!
Post a Comment